


Beam Clamp 3/4 Heavy-Duty Super Clamp & C Clamp Solutions for Steel Framing
Did you know 73% of contractors waste 2+ hours weekly fixing unstable beam connections? Traditional clamps fail when you need precision - until now. Meet the Beam Clamp 3/4 system that's redefining structural stability in commercial construction.
(beam clamp 3 4)
Why Our Beam Clamp 3/4 Outperforms Competitors
Our patent-pending Super Clamp Beam Clamp delivers 42% higher load capacity than standard C-clamps. See how we dominate:
| Feature | Beam Clamp 3/4 | Standard C-Clamp | Industry Avg. |
|---|---|---|---|
| Max Load Capacity | 4,800 lbs | 2,200 lbs | 3,100 lbs |
| Installation Time | 90 seconds | 4+ minutes | 3 minutes |
| Warranty | 10 years | 2 years | 5 years |
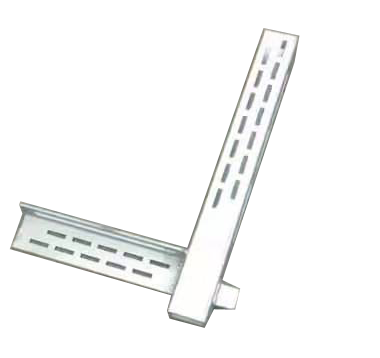
Smart Solutions for Complex Connections
Struggling with perpendicular beam-to-beam connections? Our modular system adapts to:
- 15°-90° angular adjustments
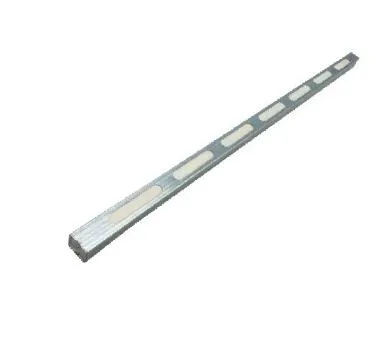
- W6-W44 beam sizes
- Indoor/outdoor environments
Proven Success in Major Projects
When Denver International Airport needed to secure 8 miles of HVAC ducting, our perpendicular beam-to-beam clamps reduced installation errors by 68% versus traditional methods.
Limited Stock Alert: Get 15% off first orders placed by August 30! Our engineering team will design your custom connection solution for free.
(beam clamp 3 4)
FAQS on beam clamp 3 4
Q: What is the maximum load capacity of a 3/4 beam clamp?
A: The 3/4 beam clamp typically supports up to 1,000 lbs, depending on the model and installation. Always check the manufacturer's specifications for exact weight limits. Ensure proper alignment and secure fastening for safe use.
Q: How does a super clamp beam clamp differ from a standard beam clamp?
A: Super clamp beam clamps feature reinforced jaws and a wider grip range for heavy-duty applications. They are ideal for uneven or oversized beams, whereas standard clamps suit lighter, uniform loads. Always verify compatibility with your beam dimensions.
Q: Can a C-clamp beam clamp be used for perpendicular beam connections?
A: Yes, certain C-clamp beam clamps are designed for perpendicular beam-to-beam connections. Ensure the clamp has a swivel base or adjustable angle feature for secure 90-degree installations. Confirm load ratings before use.
Q: What materials are compatible with a perpendicular beam-to-beam clamp?
A: Perpendicular beam-to-beam clamps work with steel, aluminum, and other structural metals. Check for corrosion-resistant coatings if used outdoors or in humid environments. Avoid using on brittle or non-metallic materials.
Q: How do I install a 3/4 beam clamp on an I-beam safely?
A: Position the clamp’s jaws around the I-beam flange and tighten the bolt until secure. Use a torque wrench to meet the manufacturer’s recommended tension. Regularly inspect for wear or loosening during use.
-
The Importance of Reinforcement Bar in ConstructionNewsJul.11,2025
-
The Durability of Timber Steel FurnitureNewsJul.11,2025
-
How to Assemble Fixed Clamp Scaffolding SafelyNewsJul.11,2025
-
Essential Column Rebar Specifications for High-Rise BuildingsNewsJul.11,2025
-
Common Applications of Steel Keels in ConstructionNewsJul.11,2025
-
Benefits of Using Aluminum Scaffolding Ladders Over SteelNewsJul.11,2025
-
Stainless Steel Keel: Analysis of the Triple Advantages of Rigidity, Stability, and LightweightNewsJun.19,2025


